As a leading award-winning Webflow design agency, we’ve had some crazy ideas from our clients before that push the tool to the limits. From no-code platforms, to creating a LMS, to hosting movies, we’ve (almost) seen it all. If you’re also a Webflow nerd like us, you’ve likely run into Webflow form file upload limitations of the CMS plan.
When we built a custom contest software on Webflow for one of our nonprofit clients, we solved for this exact issue. We needed to identify a solution to allow for file uploads on our Webflow site to sync with our custom CRM built on Airtable.
After extensive research, we came to the realization that the solution may not be finding something that integrates with Airtable. Rather, the solution itself is Airtable.
Let’s dive in and understand why Airtable forms are the easiest, lowest compromise solution to handle file uploads to your Webflow site at scale.
Webflow File Upload Solutions
Before we dive into why we chose Airtable forms as our solution to this problem, let’s also unpack the different solutions we explored. If you’ve done some research already on integrating file upload capabilities to Webflow sites, you will know that there are limited native solutions out there. Although we considered a plethora of solutions, we ultimately narrowed the decision down to three options:
- Native form uploads within Webflow
- Uploadcare as an integration to Webflow forms
- Airtable form embeds
Let’s break down each of these options.
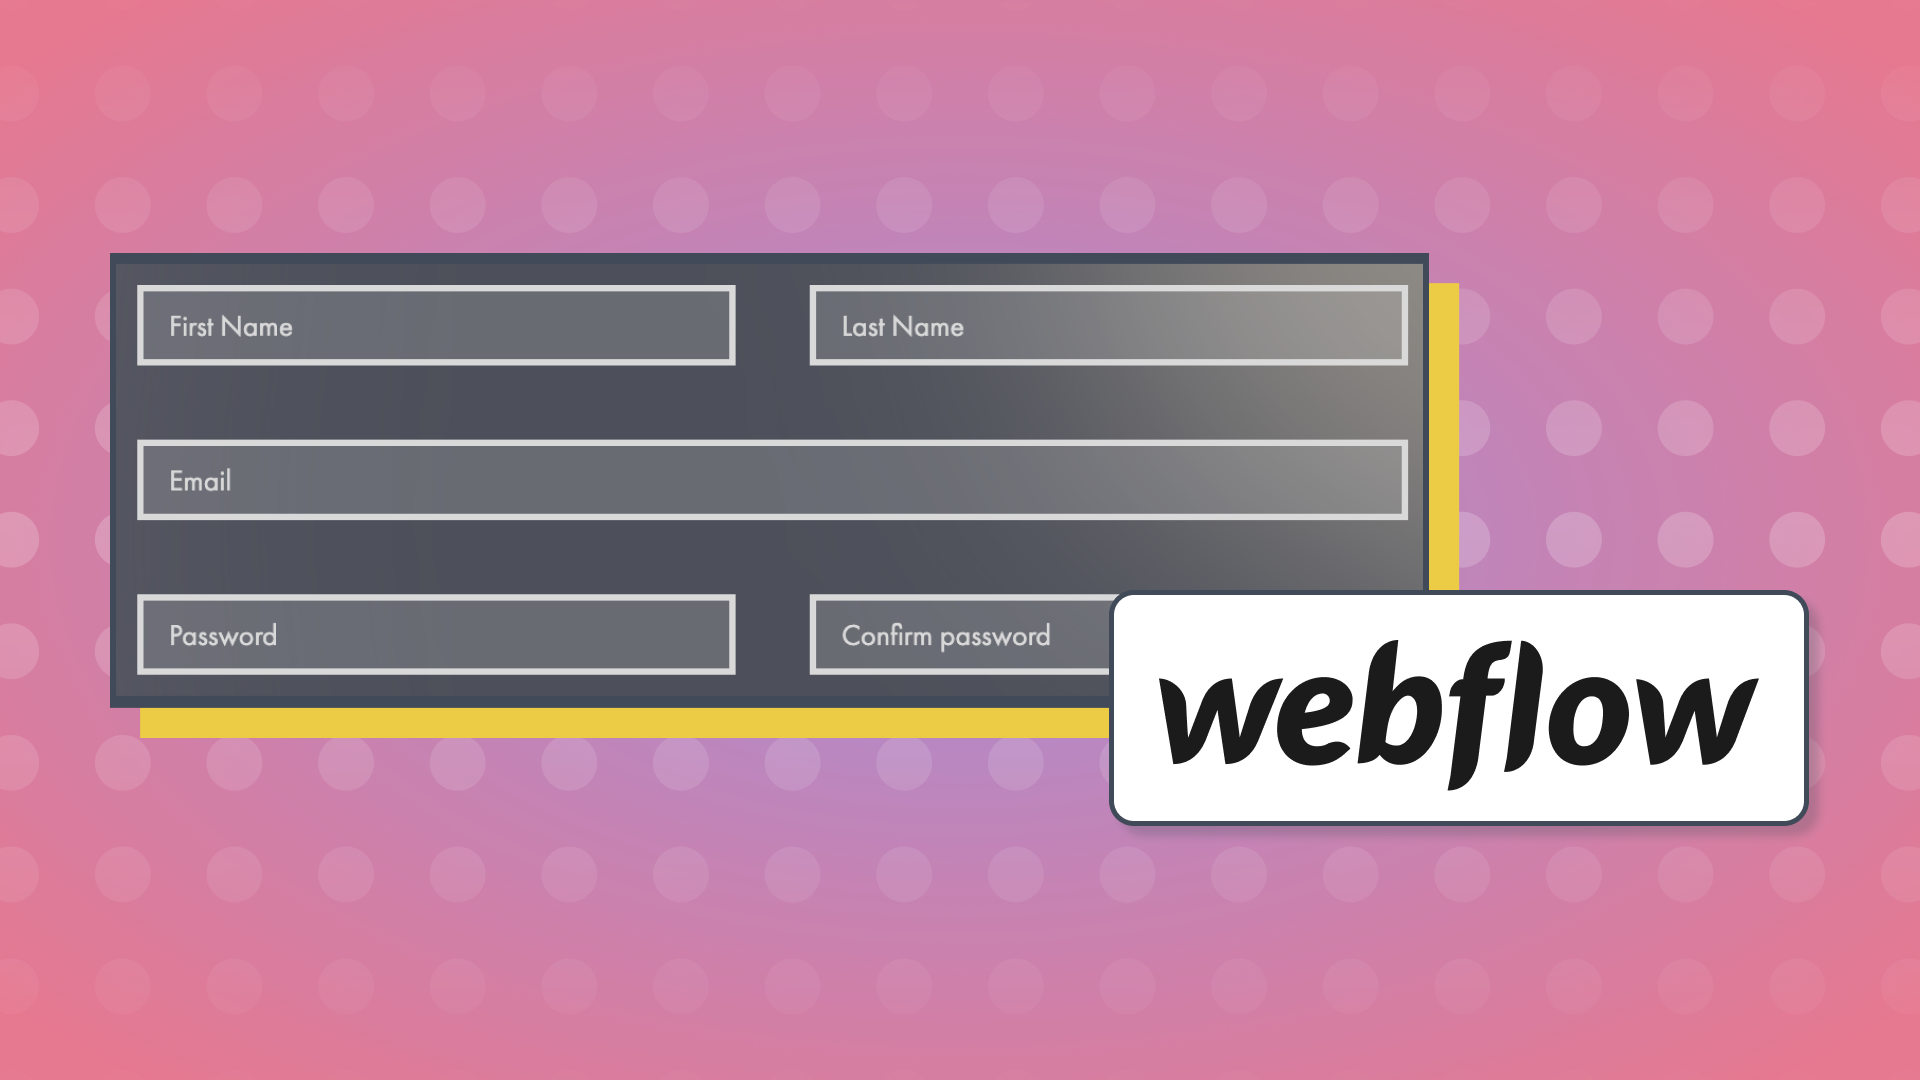
Webflow Native Forms
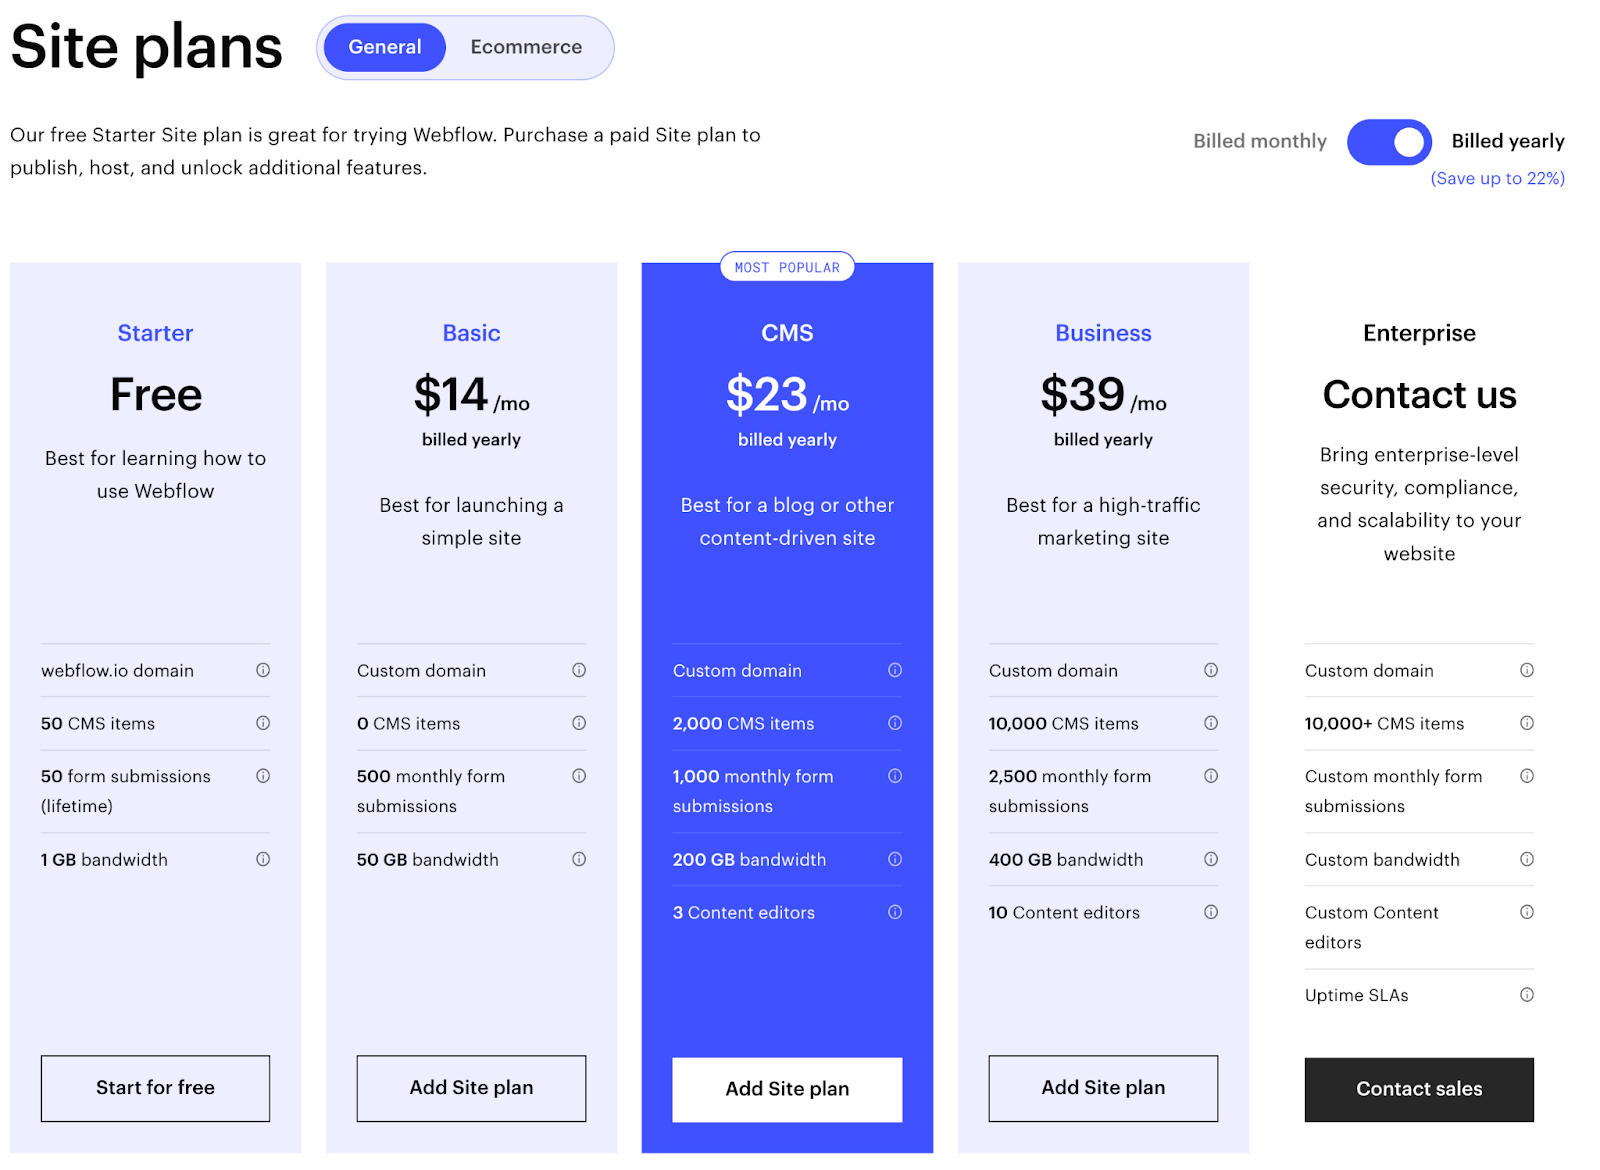
The place we started — and arguably the most straightforward solution — was to upgrade our plan to the Business tier which unlocks native file uploading.
This route is by far the easiest way to implement Webflow forms with file upload, since it’s natively built into Webflow. But, it’s not without limitations on file size and storage.
Currently, the plan allows for a maximum size of 10MB per upload with up to 10GB of storage. Any additional storage will be billed monthly at $0.50 per GB. And when you consider that upgrading from the CMS plan is a nearly $200 annual increase, the costs here were starting to add up.
Given our project's need for over 10,000 form file submissions in a single month, this solution was not suitable for us.
Uploadcare
The next solution we considered was integrating Uploadcare. Uploadcare is a powerful file handling tool with more advanced uploading capabilities and features.
Uploadcare integrates with Webflow by adding custom code to the site and targeting a field in forms through custom attributes. It’s an almost seamless solution, especially considering the incredible documentation and installation guide.
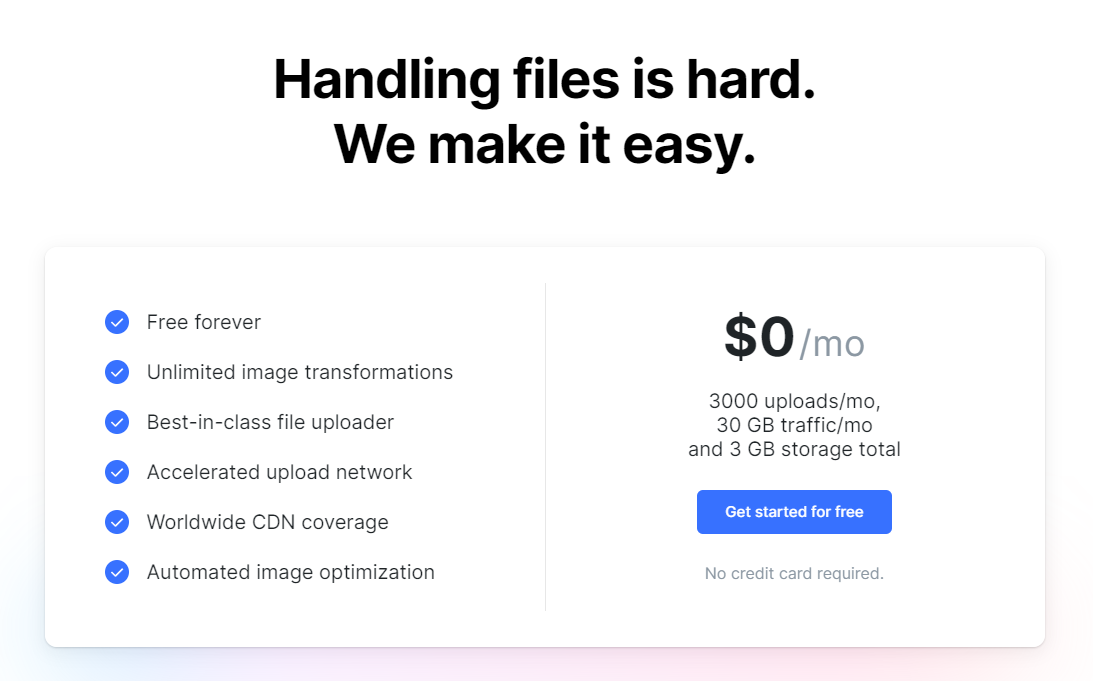
Uploadcare offers a free plan that starts at 3,000 uploads and 3GB of monthly storage, great for starting out. They also offer pay as you grow plans starting at $20 per month with 20x the storage.
In theory, this could have been a great solution for us. However, when calculating around the expected number of file uploads and their respective sizes, this would have been over $50 monthly. Considering the other integrations in the tech stack, we wanted to find a solution that would be a bit more cost effective.
On to the next one.
Airtable
At this point in our search, we had nearly exhausted our options to use native Webflow forms. We decided that given scale, budget, and time, a 3rd-party form embedded into the site would likely be the best solution. Some of the options we considered included:
- Typeform
- Paperform
- Jotform
- wpForms
- Zoho Forms
Although these options all had specific benefits, we opted for Airtable forms in the end.
Airtable is a no-code, cloud-based database platform that empowers everyday people to build custom software and workflows. You can easily manipulate, store, and organize data in a visual way tailored to your preference. We love it because it has the power of a database with the simplicity of a spreadsheet.
But don’t confuse this for another spreadsheet tool! When comparing Airtable VS Google Sheets, you’ll understand that this is a hyper flexible tool that can work as a CRM, project management tool, accounting tool, and more. Many organizations also utilize an Airtable content calendar to plan, scale, and grow their editorial strategy.
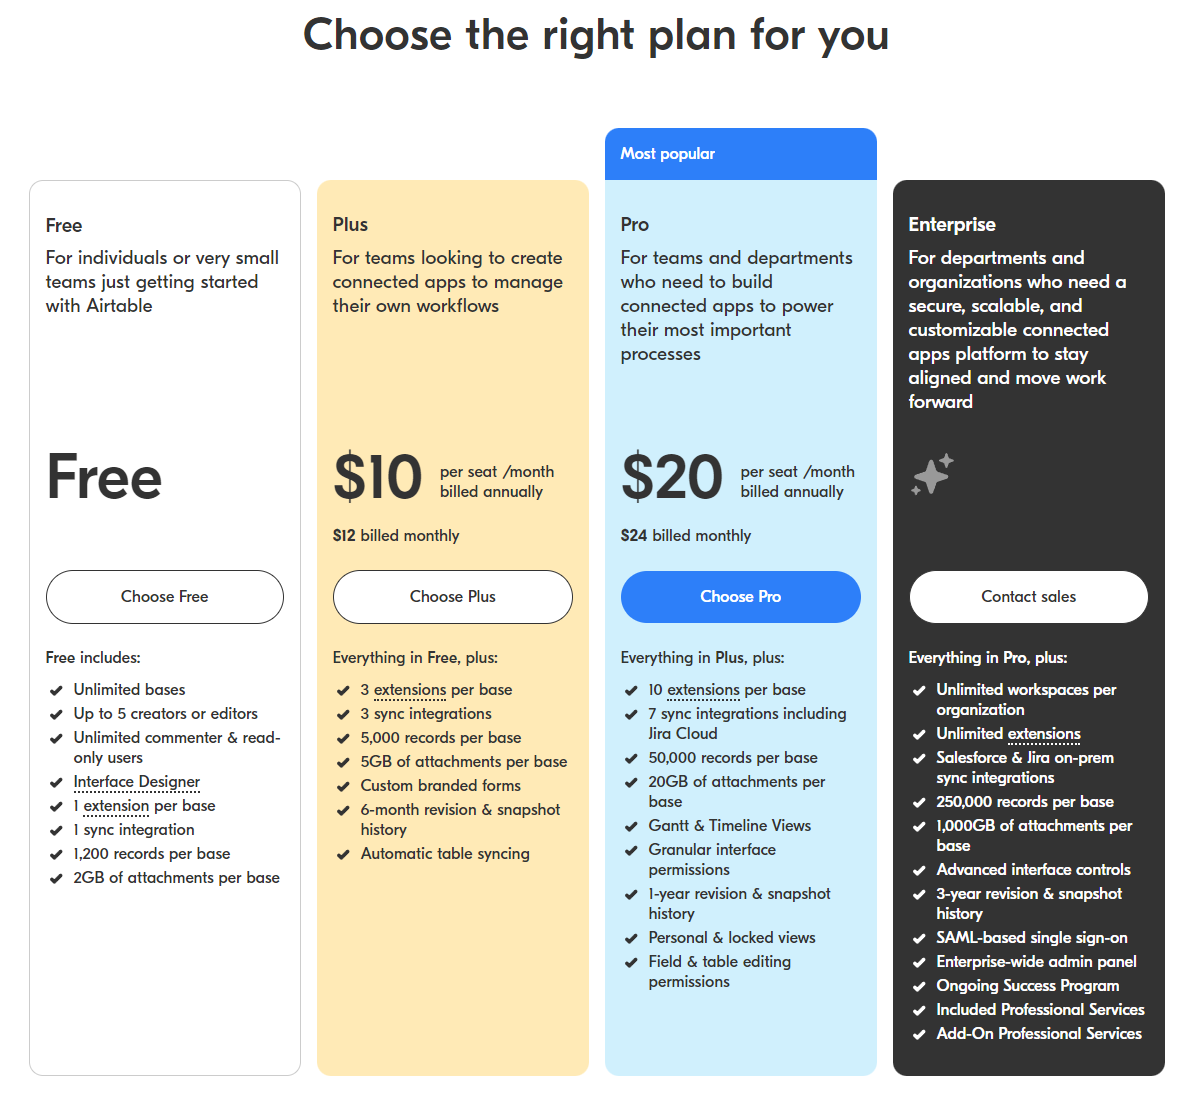
Airtable is also decently affordable, too. With our 10,000 records requirement, we opted for the Pro plan at $20 monthly. This was actually a great solution since Airtable would be our file uploader, storage, and CRM combined.
Airtable form integration: Pros and Cons
If you’re newer to Airtable, you might wonder why we didn’t opt for a Google Sheet instead here.
Similar to Google’s solution, Airtable allows you to create forms that automatically upload to your Airtable base. It also allows for you to upload files directly to a form.
However, when it comes to data management, you really are going to want to use a database tool instead of a spreadsheet.
The advantages of a database for this kind of workflow include:
- Separating your data by view
- Being able to see just one record at a time when needed
- Commenting on database entries
- Creating relationships between records and databases
- No need to rely on separate cloud storage (i.e. Google Drive, Dropbox, etc.) for file uploads
- Record specific edit history
- Automations and integrations with other apps (Slack, Mailchimp, Zapier, etc.)

This is super subjective: but there’s also something about looking at Airtable that makes the data easier to read and understand.
There must be some cons here, right? A few.
With embedding the Airtable forms into your Webflow site, the experience is a little disjointed compared to a native solution. You’re embedding an iFrame in your site, which by definition will not follow the same visual aesthetic you’ve designed in Webflow. We ultimately decided that this wasn’t a huge concern for this project.
How to Embed Airtable Forms in Website (Webflow)
Connecting Airtable to Webflow is simple. If you’ve embedded anything else within your Webflow site, this should feel familiar.
- Create a new form in Airtable by going to the "Forms" tab and clicking on the "New Form" button.
- Design your form by adding fields and customizing the layout and style.
- Once you have finished designing your form, click on the "Publish" button and choose the "Embed" option.
- Copy the embed code provided by Airtable.
- In Webflow, open the page where you want to add the form and click on the "+" icon to add a new element.
- Select the "Embed" option and paste the Airtable embed code into the "Embed Code" field.
- Adjust the size and position of the form as desired, and click "Publish" to make your changes live.
That's it! Your Airtable form is now integrated on your Webflow page and ready to collect data from your website visitors.
Embed Airtable forms: Case Study
In 2022, we partnered with our client Community Skills Initiative on their website redesign project. The example we’ve referenced throughout this article follows their Up-Skill-Athon competition, which reached underserved communities across the country to learn valuable skills for careers of the future.
We leveraged Airtable’s automation capabilities to help us run the operation of the competition. We were able to streamline the registration, documentation submission, and data processing by implementing a few key workflows, including the following:
- Send receipt emails to participants after they submit an Airtable form.
- Auto generate unique IDs for each participant when an Airtable form is submitted
- Tally and track competition submission in Airtable base
- Use Airtable views to customize data shown to various collaborators
We have implemented Airtable forms for companies as diverse as restaurants to government procurement agencies. To learn more about how we leveraged Airtable forms instead of native Webflow form file uploads, and built a custom contest software, check out our case study on this project.
Partner with Slam to Build Your Webflow Form
At Slam, we’re big fans of Airtable and have helped organizations streamline their operations in marketing, sales, and project management.
If you need support integrating Airtable with Webflow pages or CMS, reach out, we’d love to build with you!
Liked this? Take a peek at these articles:
- Airtable Social Media Automation with Zapier & Slack [Tips, Resources, Templates]
- Airtable vs Google Sheets: Which is Better for Your team?
Toast POS + Webflow Integration
Looking to re-do your restaurant website design and currently using Toast?
We gotchu! Contact us here to get a quote.

.png)